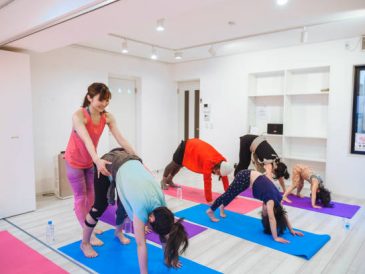
Downward-facing Dog, or Adho Mukha Svanasana in Sanskrit, is arguably the most popular pose in yoga. This is probably because it is the most frequently practiced pose and, therefore, the most recognizable by seasoned yogis and newbies alike.
When asked by a yoga practitioner which pose is the most challenging, Downward Dog will be their answer.
Pose Comfortable
Okay, this is a lie. People love Down Dog. It’s a pose that they use as a break, to take a breather from a vinyasa sequence or a challenging balance sequence. The biggest problem I have found with Downward Dog comes from the way it is taught.
There are many different schools of thought that cause alignment cues to conflict. Students can become confused and discouraged and practice the pose incorrectly, which could harm their bodies over time.
To me, it’s the differences that make this world beautiful. It is not my intention to prove who is right or wrong. I want to make your practice enjoyable and rewarding. Here are five tips to make Downward Dog more comfortable:
Position your feet
This isn’t about reaching your heels down to the floor. As you might have guessed, this alignment cue is more about comfort rather than flexibility.
You want to ensure that you are doing Downward Dog with your feet hip distance apart and your toes pointed towards the front edge. It will help your hips position themselves evenly and provide ultimate comfort for your legs, feet, and hips.
Bend Your Knees
This tip is great for people who are not flexible or feel extra tight at the back of their legs. Many people hesitate to bend their legs in Down Dog. They try to straighten out their legs and even lock their knees.
My tip: Let go of the intensity. You can find more relaxation and comfort in Down Dog by bending your knees slightly and lifting your heels an inch off the ground. You can roll up a blanket or mat and place it under your heels to provide more support.
This tip will change your game.
Support your hands and wrists.
Many people say that Downward Dog causes discomfort to their wrists or hands.
First, make sure your hands are at least shoulder-distance apart. Check your fingers. You want your middle fingers to be pointing straight forward with your fingertips spread wide. You should bend your elbows slightly to ensure that your muscles, and not your bones, are supporting the weight of your entire body.
Try this if you find you still need support after making all the adjustments. Roll a towel or blanket and place it under your hands to create a super comfortable cushion.
Relax your Neck and Shoulders
After you have checked your alignment and made all the necessary adjustments, it is time to settle into your pose.
It’s fun to shake my head or gently turn it side to side. It helps my neck relax, and my head hangs heavy. This is an excellent way to release tension from your neck as well as shoulders.
Take a deep inhale and exhale, and move your shoulders away from your ears.
Let Go of the Clutter, and Be Just You
The most important thing you can do to make Downward Dogs as comfortable as possible is to BE simple.
This is YOUR practice. It is important to follow the instructions of your teacher, but it is also important that you enjoy yourself. To make Down Dog more comfortable, clear your mind of all the clutter. Relax by taking three to five deep breaths to try to relax and clear your mind.
There’s no doubt that Downward Dog poses are challenging. You may find it difficult to relax while focusing on all the subtle alignment and adjustment cues.
Once you feel comfortable in your body, the mind should follow. It is important to keep in mind that everybody is unique. This is true for all yoga poses. What is comfortable for one yoga practitioner may be uncomfortable for another.
These tips are meant to be a guide. I hope that you will try a few different adjustments to make Downward Dog comfortable for your body.
